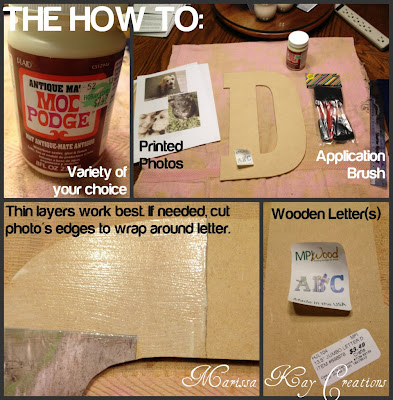
This was my first Mod Podge project! I see what all the hype is about. I LOVE this stuff. It's so versatile, easy to use, and frankly, fun to work with. I decided to make a D and cover it with pictures of my beloved pups.
-Wooden Letter(s)
-Modge Podge comes in all types of varieties. I've used antique and their basic matte. In this project I used Antique, and it definitely gave my photos a more aged/brown look to them. A good example of this is looking at the bottom right photo, the sky was white but antique made it more brown-ish.
-Sponge brush, foam brush, or paintbrush... something to apply liquid with, that you're ok throwing away afterwords.
-Printed photographs from your home computer! I read online before starting this project that most people print at home for these types of projects. I'm not sure why, but I can imagine it has to do with wrapping the photos later.
The challenging part with this project is definitely getting the best layout of photographs. Getting your photos to line up and look right is more time consuming than you think. I suggest printing several extra photos (different sizes) so you are able to align them more easily. When wrapping the photos, I found it useful to cut the sides into strips. These strips allowed me to bend the photo around the sides and glue to the back (the back looks absolutely terrible). You could aso cut them exactly if you planned to paint the edges of your wooden letter.
5 Steps for this project:
1. Arrange your photos in an approximate layout on your letter.
2. Do only one photo at a time. Apply a THIN layer of mod podge to your letter. I found it helpful to trace the outline of my photo first so I knew where the glue should go.
3. Place your photo on the letter, pushing to smooth it out.
4. Cut the paper hanging over so it's easier to wrap around to the back. Use modpodge on the sides and on the back to seal it and keep it in place.
5. After all of your photos are glued on, take mod podge and literally make a thin layer on the entire project. This felt weird to me, but it helps to seal the project. I didn't put it over top after each photo because I wanted the brush to make "smooth lines" across the entire surface of the letter.
I added some sticker word embellishments at the very end.
If you have any questions let me know!! :)


